Choosing the right LED wall washer comes down to getting four things right: wattage, beam angle, housing color, and build quality. If you’re wondering how to choose the right LED wall washer, getting these factors wrong can lead to hotspots, glare complaints, premature failures, and costly callbacks. Get them right, and your façade can look intentional and professionally illuminated for years.
Using the exact specs you’ll find on our wall washer line—18W to 72W, 10×60° or 120° beam angles, four housing colors, aluminum plus tempered glass construction, IP65 rating, and a fixed adjustable bracket—this guide explains what to look for when selecting a fixture. Whether you’re a facility manager, electrical contractor, or building owner, you’ll know how to choose LED wall washers with confidence.
Table of Contents
How to Choose the Right Wattage (18W / 24W / 36W / 48W / 72W)
Wattage is the first spec most buyers look at, and also the one most often misunderstood. Watts measure how much power a fixture draws, not how bright the wall will look. Actual brightness depends on the LED efficiency, the optics, the beam angle, and how far the fixture sits from the wall.
That said, wattage is still a useful starting point, because it tells you how much light output you have to work with. Here is a practical way to think about our range:
| Wattage | Best for | Typical use |
| 18W / 24W | Short spans, low walls, close mounting distances | Garden walls, shopfronts, accent lines, narrow facades |
| 36W | Medium facades | The balanced choice for most mid-size projects |
| 48W / 72W | Tall buildings, long throw distances, bright surroundings | High-rise facades, bridges, areas with strong ambient light |
Match wattage to wall height and distance.The taller the wall and the farther the fixture is from it, the more output you need to reach the top evenly. A low garden wall lit from a short distance rarely needs more than 18W or 24W. A multi-story facade lit from the ground usually calls for 48W or 72W.
Consider the surface. Light-colored, smooth surfaces reflect more light, so they need less power. Dark stone, brick, or textured concrete absorbs light, so you may need to step up a wattage level to get the same visual result.
Consider the surroundings. A wall next to a brightly lit street needs more output than the same wall in a quiet, dark area, because the wash has to compete with ambient light.
Beam Angle: What's the Difference Between 10×60° and 120°?
10×60° This is the beam pattern you want for most building washing. The narrow 10° vertical spread throws light upward in a controlled column, while the wide 60° horizontal spread fans it out along the wall. Because the light is aimed up and sideways rather than straight out, there’s far less spill glare hitting pedestrians, adjacent windows, or the street. If you’re lighting a tall facade and want it to read as taller, this is your beam.
120°—the symmetrical wide flood. A 120° beam spreads light evenly in all directions from the fixture. It’s wider and softer, but far less controlled. Use it for low walls where you want a broad, gentle wash, for walkways and plazas where the fixture lights the ground directly below it, or for situations where you need general area illumination rather than a directed facade wash.
tall building or dramatic facade → 10×60°. Low wall, walkway, or general area light → 120°. Most facade projects should default to the 10×60° and only switch to 120° when the surface is low and the goal is broad, even coverage rather than upward throw.
lack, Silver, White, or Orange — Which One Should You Pick?
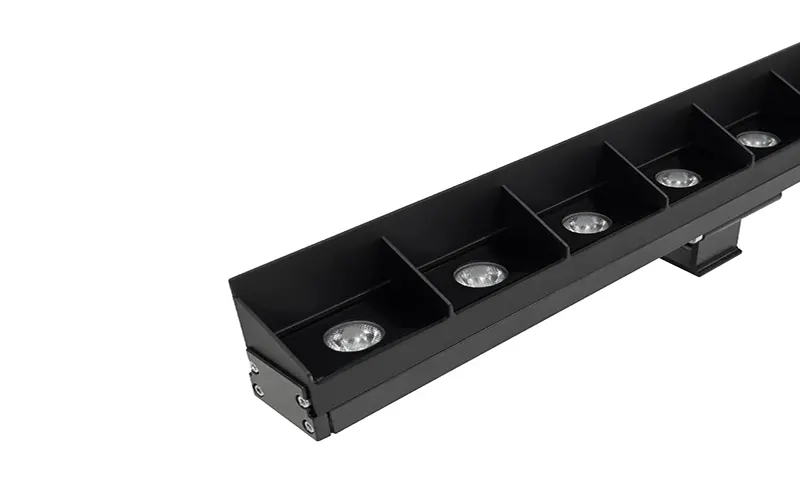
Our wall washers come in four finishes:
Black: Blends into dark facades, shadows, and night scenes. It gives a clean, modern look and is the safest choice for most contemporary buildings.
Silver: Pairs naturally with metal cladding, glass curtain walls, and aluminum framing. It suits a classic architectural style and looks polished against cool-toned materials.
White: Disappears against light-colored walls, ceilings, and pale stone. If you want the fixture to be as unnoticeable as possible on a bright surface, white is the right pick.
Orange: A deliberate design choice. It works as a brand-color accent, a bold architectural feature, or a way to add personality to a project that would otherwise feel plain.
Choose the housing color that matches the surface behind or around the fixture, not the one you like best in a catalog photo. A black fixture on a white wall draws the eye. A white fixture on the same wall nearly vanishes. Decide whether you want the fixture to blend in or stand out, and pick accordingly.
Aluminum Housing, Tempered Glass, and IP65
A wall washer lives outdoors, often for years, in rain, heat, dust, and temperature swings. Build quality determines whether it still looks and performs well after the first few seasons.
Aluminum housing. Aluminum is a smart choice for outdoor lighting for two reasons. First, it conducts heat well, which helps pull heat away from the LEDs. Cooler LEDs last longer and hold their brightness better over time. Second, it resists corrosion, especially when it has a good surface coating. A sturdy metal body also stands up better to knocks during installation and maintenance.
Tempered glass. Our fixtures use tempered glass as the light-transmitting material. Compared with plastic lenses, tempered glass offers strong impact resistance and stays clear over time, without the yellowing or hazing that plastic can develop under constant UV exposure.
IP65 protection. The IP rating tells you how well a fixture is sealed. In IP65, the first digit (6) means the fixture is fully protected against dust. The second digit (5) means it is protected against low-pressure water jets from any direction. In practical terms, that covers heavy rain and routine cleaning with a hose.
It is worth being clear about what IP65 does not cover. It is not designed for submersion. If a fixture will sit in standing water, or be buried or flooded, you need a higher rating.
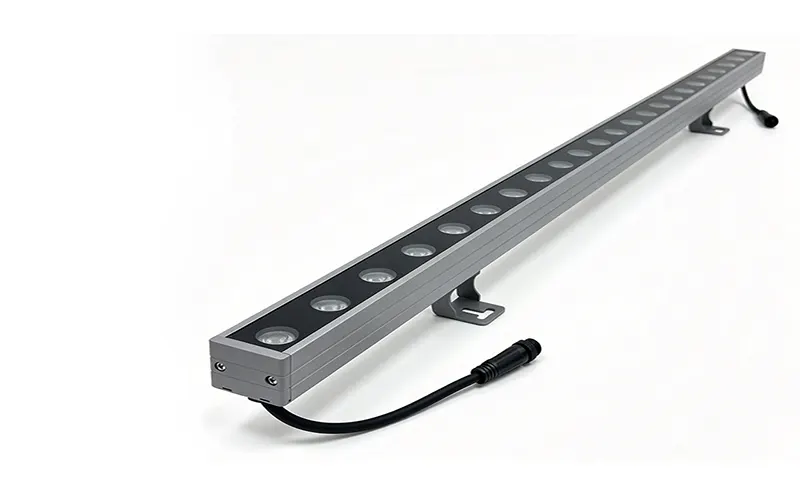
Why an Adjustable Bracket Saves You Headaches
The bracket holds the fixture securely in place while still allowing you to tilt and adjust the aiming angle. That flexibility matters for several reasons:
Real sites are never exactly like the drawings. Walls are uneven, ground levels vary, and measurements shift. Being able to adjust on site means you can correct for these differences instead of living with them.
Fine-tuning improves the result. A few degrees of tilt can be the difference between an even wash and a visible hot spot near the base of the wall.
Corrections are easy later. If the lighting design changes, or the result needs refining after the first night test, you can re-aim the fixture without replacing it or redrilling.
3 Mistakes We See All the Time (And How to Avoid Them)
After enough installations, the same three mistakes show up again and again. All of them are avoidable with a few minutes of planning.
Mistake 1: Mounting too close to the wall. A 10×60° fixture placed 10 cm from the wall produces a blown-out hotspot near the top of its throw and a dark gap below — the opposite of a smooth wash. Back the fixture off to 30–50 cm from the wall, and the beam has room to spread into an even gradient. If you’re using 120° fixtures, the same principle applies: too close means harsh, uneven light.
Mistake 2: Mixing color temperatures across batches. Even within the same nominal color temperature, LED bins vary. A 4000K fixture from one production batch and a 4000K fixture from another can look visibly different side by side — one slightly warmer, one slightly cooler. On a facade with twenty fixtures, that reads as inconsistency. Order all fixtures for a project in a single batch.
Mistake 3: Ignoring glare. A bare 120° lens mounted at eye level is genuinely blinding — and on residential, hospitality, and pedestrian-facing projects, that generates complaints fast. Wide-angle fixtures near walkways need glare control: a recessed mounting position, a honeycomb louver, or an anti-glare shield. The 10×60° beam is naturally better behaved here because it aims light up and along the wall rather than outward, which is one more reason it’s the default for facade work.
Summary
For wattage, choose from 18W, 24W, 36W, 48W, and 72W according to the wall size, mounting height, and required illumination. For beam angle, compare 10×60° and 120° based on whether you need more controlled or broader light distribution. Then consider housing color, outdoor protection, construction materials, and mounting flexibility.
For outdoor architectural projects, the combination of aluminum housing, tempered glass, IP65 protection, and an adjustable bracket provides a practical foundation for reliable installation and accurate aiming.
Our team is happy to review your project. Send us your wall dimensions, mounting distance, and any photos of the site, and we will recommend the right wattage, beam angle, and color for your project. Contact us today for a free lighting suggestion, or request a sample to see the quality for yourself.