If you’ve ever dug through a dark cabinet looking for a mixing bowl or fumbled for a light switch with your hands full, you already know why cabinet door sensor switches have become such a popular upgrade. They’re small, inexpensive, and once installed, you genuinely forget they’re there — until the light clicks on the moment you open the door and off the moment you close it.
Double-door cabinets add a small wrinkle to the installation process, though. You’re dealing with two doors, two potential trigger points, and a decision about whether both doors should control the same light or work independently.
What Is a Cabinet Door Sensor Switch?
A cabinet door sensor switch is an electronic device that automatically controls lighting based on door movement. When you open a cabinet door, the sensor detects the change and triggers the connected LED lights to turn on. Close the door, and the lights turn off automatically.
How It Works
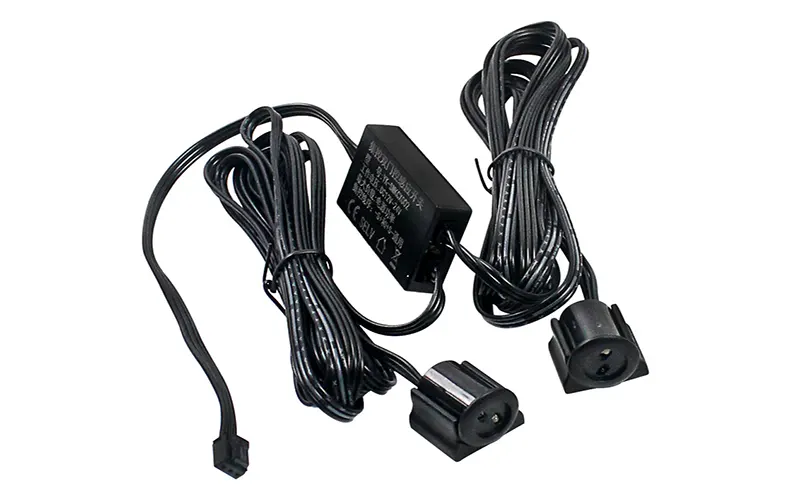
Most cabinet door sensor switches use infrared (IR) detection technology. The sensor emits an infrared beam and detects changes when the door moves within its sensing range. For a double-door sensor, the system is designed to monitor both doors simultaneously—opening either door triggers the lights, and the lights only turn off when both doors are closed.
Key Specifications to Know
Before purchasing, pay attention to these specifications:
- Rated Voltage: Most models operate on 12V or 24V DC. Always match this to your LED driver to avoid compatibility issues.
- Sensing Distance: Standard sensors detect door movement within 5–8 centimeters. If the gap between the sensor and the door is larger than this, the sensor may not trigger reliably.
- Color Options: Available in silver, white, black, and champagne to match your cabinet hardware and interior design.
- Anti-Interference Features: Quality sensors include background suppression or anti-reflection technology to prevent false triggers from sunlight or reflective surfaces—especially important for glass-door cabinets.
- Detachable Sensor Heads: Some models feature replaceable sensor heads, allowing you to swap out a faulty sensor or change the sensing type (door, hand wave, PIR, touch) without replacing the entire unit.
How to Install a Cabinet Door Sensor Switch for Double Doors Step by Step
Installing a Cabinet Door Sensor Switch for double doors requires more attention than a single-door application because you need to consider both door positions and how they interact with the LED lighting.
Step 1: Confirm the Voltage
Before installation, check the specifications of the LED lighting and power supply.
This sensor is designed for 12V–24V DC applications, so make sure the power supply and LED load are compatible with the sensor.
A basic wiring structure is:
12V–24V DC Power Supply → Sensor Switch → LED Light
Always confirm the manufacturer’s wiring instructions before connecting the system.
Step 2: Determine the Door Opening Direction
Open and close both cabinet doors several times before fixing the sensor.
Observe:
- Which door opens first?
- How far does each door move?
- Where do the doors meet?
- Is there enough space for the sensor?
- Could the hinge or door panel interfere with the sensor?
This simple test can prevent many installation problems later.
Step 3: Select the Sensor Position
The sensor should be installed where the door can reliably move within its 5–8 cm sensing range.
Avoid choosing a position simply because it looks convenient. The most important consideration is the actual movement of the door relative to the sensor.
For a professional installation, it is better to temporarily position the sensor and test it several times before permanently fixing it.
Step 4: Connect the LED Lighting
Connect the LED light and sensor according to the wiring configuration.
Make sure the polarity and voltage are correct before switching on the power.
If you are installing LED strips inside a wardrobe or cabinet, plan the wiring route at the same time. Keep cables away from hinges and other moving components to prevent damage during repeated door operation.
Step 5: Install the Double-Cabinet Door Sensor Switch
The control method depends on whether you want both doors to operate the same lighting zone or control different lighting sections.
This is where centralised double-door control and independent double-door control become important.
Step 6: Test Both Doors
After installation, test the system systematically.
Open the left door and check whether the light responds correctly. Close it and repeat the test with the right door.
Then open and close both doors together.
The final system should respond consistently without unwanted triggering or failure to turn the light off.
Practical installation tip: Do not permanently fix the sensor until you have tested the actual door movement. A few minutes of testing can save significant time if the sensor needs to be repositioned.
Centralised vs. Independent Double-Door Sensor Control: Which Should You Choose?
Double-door cabinets can use different sensor control configurations. The best option depends mainly on the lighting layout and how you want each door to control the lights.
Centralised Double-Door Control
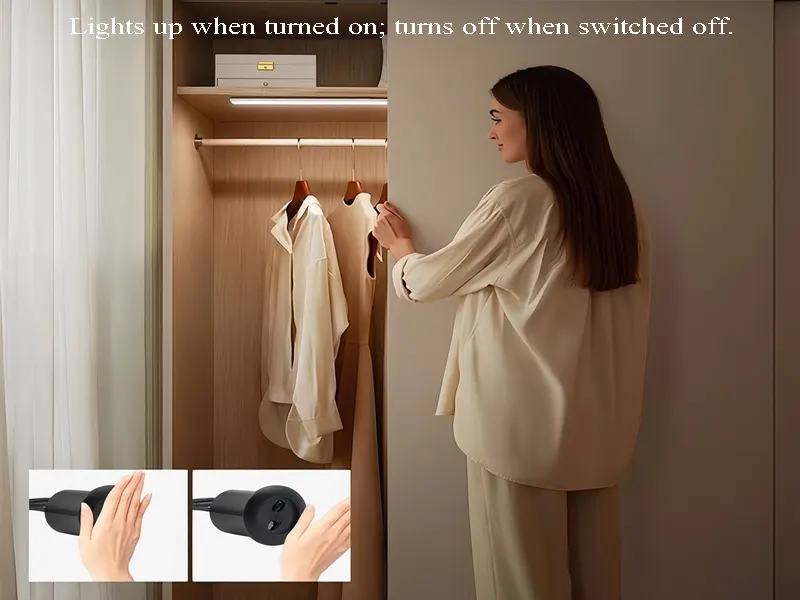
With centralised double-door control, both doors are connected to a shared control arrangement.
This can be a good choice when both doors operate the same LED lighting zone.
For example, imagine a large wardrobe with one continuous LED lighting system. You want the light to respond to the opening of either door rather than treating each side as a completely separate lighting system.
Centralised control can provide a cleaner and more straightforward solution for this type of installation.
Independent Double-Door Control
With independent double-door control, each door has its own sensing/control function.
This configuration is useful when the left and right sides of a cabinet need to operate separately.
For example:
- Left door → Left-side LED lighting
- Right door → Right-side LED lighting
This can reduce unnecessary lighting and provide greater flexibility for cabinets with multiple lighting zones.
Which One Should You Choose?
A simple way to decide is:
One lighting zone: Centralised double-door control is often the more suitable choice.
Two independent lighting zones: Independent double-door control can provide greater flexibility.
However, cabinet structure, wiring distance, LED load, and installation space should also be considered before selecting the control configuration.
How to Position the Sensor for Reliable Detection
Respect the sensing range. With a 5–8 centimeter detection distance, the sensor needs to be close enough to the door’s resting and opening path to register the change reliably. Mount it too far from the door’s swing arc, and you’ll get inconsistent triggering.
Avoid reflective surfaces directly in the sensor’s line of sight. Glossy cabinet interiors, foil-backed insulation, or nearby mirrored surfaces can cause reflection issues with proximity sensors.
Test before you commit to permanent mounting. Hold the sensor in place, connect it temporarily if your kit allows, and open/close the door a few times at different speeds. Sensors that seem to work fine on a slow, deliberate test open can sometimes miss quick door swings — better to catch that now than after the adhesive has set or the screws are in.
For double doors specifically, make sure the two sensors aren’t positioned in a way where one door’s movement interferes with the other’s detection zone — this is more of a risk on narrower cabinets where the doors sit close together when both are opened.
How to Choose the Right Cabinet Door Sensor Switch
Here’s what to look for when buying a double-cabinet door sensor switch.
1. Match Voltage to Your System
Most sensors operate on 12V or 24V DC. Ensure your LED driver matches the sensor’s voltage rating. Using a 24V driver with a 12V sensor can damage the unit.
2. Choose the Right Control Type
Decide between centralised and independent control based on your needs.
3. Look for Detachable Sensor Heads
Models with detachable sensor heads are more versatile and easier to maintain. If a sensor fails, you can replace just the head without rewiring the entire system. Some models even let you swap between door, hand wave, touch, and PIR sensing modes using different heads.
4. Consider Anti-Interference Features
If installing near reflective surfaces or windows, opt for a sensor with background suppression to avoid false triggers.
5. Choose a Color That Blends
Match the sensor finish to your cabinet hardware. Silver works well with stainless steel, white with bright interiors, black with dark finishes, and champagne with warm wood tones.
6. Check the Sensing Distance
Ensure the sensor’s range suits your cabinet design. Standard is 5–8cm, but some models offer extended range up to 10cm.
Summary
Installing a cabinet door sensor switch for double doors upgrades your custom millwork into an intuitive, automated lighting experience.
Browse our collection of cabinet door sensor switches in silver, white, black, and champagne finishes—designed for 12V–24V systems with reliable 5–8 cm sensing and anti-interference protection.
FAQs
Can I use a single-door sensor for double doors?
No. Single-door sensors are designed for one door and cannot track the “both doors closed” condition required for double-door control.
What happens if I leave a door half-open?
For centralised control, the lights will stay on until both doors are fully closed. Some models include an auto-off feature that turns the lights off after a set time (e.g., one hour) to save energy.
What if my sensor stops working after installation?
If your model has a detachable sensor head, try swapping it with a replacement. This is much easier than rewiring the entire unit.
Why does my cabinet light stay on after closing the door?
The most common causes are incorrect sensor positioning, an unsuitable sensing distance, wiring problems, or the sensor continuing to detect the door. Check the sensor’s position and ensure the door moves correctly through the intended 5–8 cm detection range.
Is a cabinet door sensor switch suitable for wardrobes?
Yes. Wardrobes are one of the most common applications because automatic lighting makes it easier to see clothing and stored items without manually operating a switch.
What colours are available?
Common finishes include silver, white, black, and champagne, allowing the sensor to coordinate with different cabinet and furniture designs.