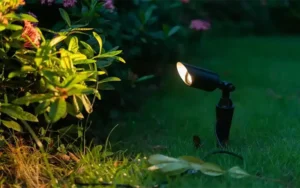
Water features are one of the most attractive elements in a garden, and LED fountain lights can elevate their nighttime charm to a whole new level. Whether it’s a fountain, pond, or small waterfall, the right lighting not only enhances the visual effect but also creates a dreamy atmosphere. However, water feature lighting installation involves various factors such as waterproofing, electrical safety, and lighting design, requiring professional guidance.
This article will provide you with a comprehensive understanding of LED fountain light selection, installation steps, and common pitfalls to avoid, helping you safely and efficiently complete your water feature lighting upgrade.
Table of Contents
What are LED Fountain Lights?
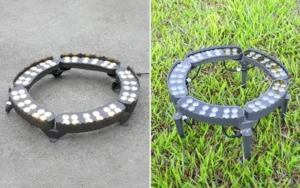
LED fountain lights are underwater lighting devices specifically designed for fountains, pools, and other water features. Their housings are made of stainless steel, copper, or high-strength aluminum alloy, possessing excellent waterproof, corrosion-resistant, and pressure-resistant properties, typically with an IP68 rating, suitable for long-term submersion in water.
Common features include:
Voltage range: DC12V or 24V, ensuring safer low-voltage operation
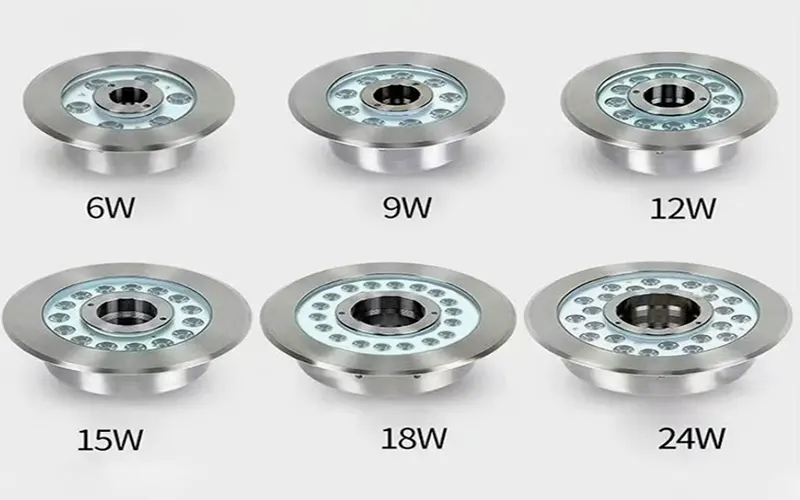
Power range: Commonly available in 18W, 24W, 36W, 48W, 72W, 96W, and 108W
Light color types: Single color (warm white/cool white), RGB, RGBW, meeting different atmospheric needs
Beam angle: 5° / 10° / 15° / 30° / 60° / 90°, allowing for spotlight or floodlight effects
Luminous efficacy: 100-130 LM/W, high brightness and energy efficiency
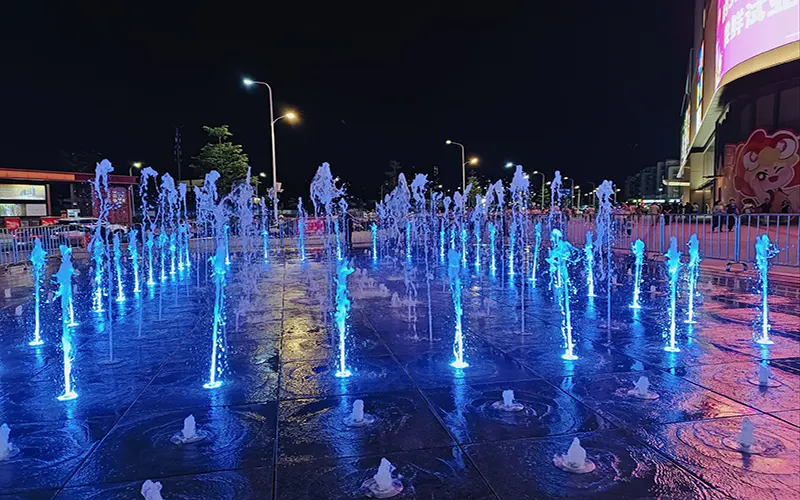
LED fountain lights are typically installed at the bottom of fountain nozzles, along the edges of pools, or on the pool walls. They use controllers to achieve color changes, chasing effects, and flashing effects, creating a dynamic visual experience in conjunction with the water flow.
What preparations are needed before installing LED fountain lights?
To ensure a smooth installation of your LED fountain lights, you need to prepare the following in advance:
1. Light Fixture and Related Accessories
First, choosing an LED fountain light that suits your garden water feature needs is fundamental. Based on the size of the pool, fountain height, and desired lighting effect, determine the following parameters:
Power: Common options include 18W, 24W, 36W, 48W, 72W, 96W, and 108W. Higher power means brighter light, but also higher energy consumption.
Light Color: Options include single color (warm white, cool white), RGB three-color, or RGBW four-color. RGBW lights offer a richer range of color changes.
Beam Angle: From narrow beam angles of 5° and 15° to wide beam angles of 60° and 90°, suitable for different fountain types and illumination ranges.
In addition, you should prepare:
- Waterproof power cable: High-quality sheathed cable is recommended for long-term underwater operation.
- Professional waterproof connectors: To ensure that the cable connections remain watertight even when submerged for extended periods;
- Mounting brackets or fixing screws: To securely fix the light fixture according to the pool structure, preventing loosening or angle displacement.
2. Power Supply and Control System Configuration
LED fountain lights are mostly low-voltage designs, using DC power, usually DC12V or DC24V. It is crucial to ensure that the power supply output voltage matches the voltage specified on the light fixture; otherwise, it may lead to lamp burnout or insufficient brightness.
If you are using RGB or RGBW fountain lights, you will need a corresponding control system to achieve color changes and dynamic lighting effects, such as:
DMX512 controller: Suitable for large water features or projects requiring programmable lighting;
Simple remote control: Suitable for small home fountains, easy to operate;
Wireless control or APP control system: Allows for remote management of multiple sets of lights, enhancing the intelligent experience.
In addition, to improve stability, it is recommended to use a constant voltage waterproof power supply and install it in a dry and well-ventilated environment.
3. Safety Protection and Installation Tools
The combination of electricity and water in this scenario demands extremely high safety standards. The following tools and protective equipment are essential to ensure complete safety during installation:
Electrical tape and heat shrink tubing: Used to wrap cable connections and enhance sealing;
Waterproof sealing kits and O-rings: Provide further protection for connectors, preventing moisture ingress;
Wire crimping pliers and screwdrivers: Used to assist with wiring and securing light fixtures;
Ground Fault Circuit Interrupter (GFCI) or waterproof electrical box: A GFCI or waterproof electrical box must be installed at critical electrical points to prevent electric shock;
Insulating gloves and waterproof test pen: Enhance the safety of the installation personnel.
Correct Installation Steps for LED Fountain Lights
Installing LED fountain lights is a task that demands high standards for both electrical safety and visual effects. To ensure the lights operate stably for a long time and display the best lighting effects, the following standard procedures must be strictly followed:
Step 1: Determine the Installation Location
First, the installation location and number of lights should be scientifically planned based on the fountain’s structure type, water jet height, pool depth, and overall water feature layout. It is generally recommended to install the fountain lights directly below or around the nozzles, using an upward-facing illumination method to highlight the water column, sculptures, or surrounding water features.
Precautions:
- Excessive distance will lead to light dispersion and uneven brightness;
- Too close a distance may cause glare or uneven light spots;
- When using multiple lights, avoid mutual obstruction or overlapping light blind spots.
Step 2: Laying Cables and Fixing the Luminaires
After determining the locations, begin laying the cables and fixing the luminaires.
It is recommended to embed the cables in the bottom of the pool or within the stone structure to prevent them from being exposed to water currents or external forces. The cable channels should avoid sharp objects and moving structures to prevent wear and tear.
The luminaires can be fixed using stainless steel brackets, flanges, or expansion bolts to ensure they do not shift or tilt underwater. Some fountain lights support angle adjustment; you can roughly adjust the angle first before tightening the screws, making it easier to fine-tune the beam direction later.
Step 3: Wiring and Waterproofing
After the cables are laid, they need to be connected to the power supply or control equipment.
This step is crucial for waterproofing. It is essential to use professional-grade IP68 waterproof connectors, along with waterproof sealant, heat shrink tubing, and electrical tape for triple sealing, ensuring that the connections can withstand prolonged submersion without water ingress.
If using RGB or RGBW lights, ensure that each signal wire, ground wire, and power wire is connected correctly according to the instructions. Avoid incorrect polarity or omitting the ground connection.
Step 4: Connect the Control System and Perform Functional Testing
After all the lighting fixtures are wired, start the control system for overall testing.
For single-color fixtures: Test if all lights turn on and if the brightness is consistent;
For RGB/RGBW fixtures: Test if the colors can be switched smoothly and if effects such as jumping, fading, and chasing lights are supported.
If using a DMX512 controller, address settings are also required to ensure that each fixture responds to the correct commands. During debugging, it is recommended to test each channel individually for subsequent unified programming control.
Step 5: Fill with water and test the final lighting effect
After confirming that all connections are secure and waterproof, you can begin filling the pool with water. During the filling process, continuously observe for any water leakage at the connections, displacement of the light fixtures, or light beam misalignment.
Once the pool is full, turn on the lights and observe the overall effect, including the water jets, spray patterns, and reflections from the pool bottom, making any necessary angle adjustments.
Common Installation Errors and How to Avoid Them
Error 1: Incorrect light fixture angle
This causes the light to deviate from the fountain’s water column. The solution is to adjust the angle during installation.
Error 2: Using non-waterproof connectors
This can easily cause short circuits or corrosion. IP68-rated waterproof connectors must be used.
Error 3: Mismatched power supply
Connecting a DC12V light fixture to a 24V power supply may burn it out. Always verify the voltage specifications.
Error 4: Incorrect controller wiring
Especially in RGB/RGBW systems, incorrect wiring can lead to abnormal colors or the lights not working. Carefully follow the wiring diagram in the instructions.
How to choose the right LED fountain lights for your garden water feature?
When choosing LED fountain lights, you need to consider the following aspects:
| Parameter | Options | Typical Applications | Buying Recommendations |
|---|---|---|---|
| Power | 18–24W | Small fountains / decorative water features | Allocate 10–15W per 1㎡ of water surface |
| 36–48W | Medium ponds (3–5㎡) | Balanced brightness and energy efficiency | |
| 72W+ | Large waterfalls / main fountain structures | Suitable for long throw and high water columns | |
| Color | Single color (3000–6500K) | Traditional designs / continuous lighting | Choose 3000K for warm tone, 4000K for neutral white |
| RGB | Festive atmosphere / dynamic effects | Requires RGB controller | |
| RGBW | Professional fountain shows | Cleaner white output and better color rendering than RGB | |
| Beam Angle | 5°–15° | Accent lighting (sculptures / fountain columns) | Narrow beams may require glare shields |
| 30°–60° | General fountain lighting | 30° is the most commonly used option | |
| 90° | Wide-area flood lighting | Ideal for shallow or background illumination | |
| Voltage | 12V | Small systems (cable run ≤10m) | Safest option for residential and decorative use |
| 24V | Large systems (cable run ≤20m) | Lower voltage drop, better for long-distance wiring |
Example Combinations:
Small garden fountain: 24W RGB + 30° beam angle + 12V
Medium fountain lighting: 36W 4000K single color + 60° beam angle + 12V
Musical fountain: 72W RGBW + 15° beam angle + 24V
Note: All underwater lights must have an IP68 waterproof rating, and silicone is the preferred material for the sealing rings.
Conclusion
By carefully selecting and properly installing LED fountain lights, your water feature will come alive with new vibrancy at night. Remember the core principles: prioritize safety and waterproofing, match the lighting effect to the scene, and allow for maintenance access.
We offer a wide range of LED fountain lights, covering power ratings from 18W to 108W, single-color/RGB/RGBW options, and various beam angles and control methods.
Browse our fountain light series or contact our sales team for the latest pricing!
FAQs
Can LED fountain lights be directly connected to a household 220V power supply?
Absolutely not! They must be connected through a transformer to convert the voltage to 12V or 24V low voltage.
What should I do if the lights are misaligned after filling the pool with water?
This may be due to insecure mounting or incorrect angle adjustment. You can first turn off the power, drain some of the water, readjust the angle of the light fixture, and tighten the mounting screws. It is recommended to use adjustable brackets during installation and to perform angle estimation and testing beforehand to reduce repeated adjustments.
How often do the lights need to be replaced or maintained when used in water?
Generally, high-quality LED fountain lights have a lifespan of 30,000 to 50,000 hours. However, it is recommended to check the light fixture for dirt buildup, loose brackets, and aging cables every quarter. Timely cleaning and tightening will effectively extend the service life.